

Both journals... Alyssa's is silver & Katie's is Bronze
I've been wanting to surprise my girls with handmade journals... but I also wanted them to pick out their favorite embellishments. Mmmm... what to do? I know... let them pick out their favorites, but don't let them watch me create. So, I was constantly going into their room with random Tim Holtz items and asking them, "Which one is your favorite?". As it turned out... Alyssa chose all silver embellishments and Katie chose all Bronze. As for the Recollection black keys on the cover, I only had one of each and was hoping they didn't choose the same one!! I asked Katie first... then went to Alyssa. At first she wanted the same one... uh oh... now what? Then she changed her mind and said, "Nah, I like this one better"... whew... now I can go CREATE!! :)

Both journals... using Tim Holtz "Worn Cover - Journaler"
I used the "Large Black Metal Tabs" and created the tab labels in photoshop.
They say, "My Life Story"... "Prayers"... and "Calendar".
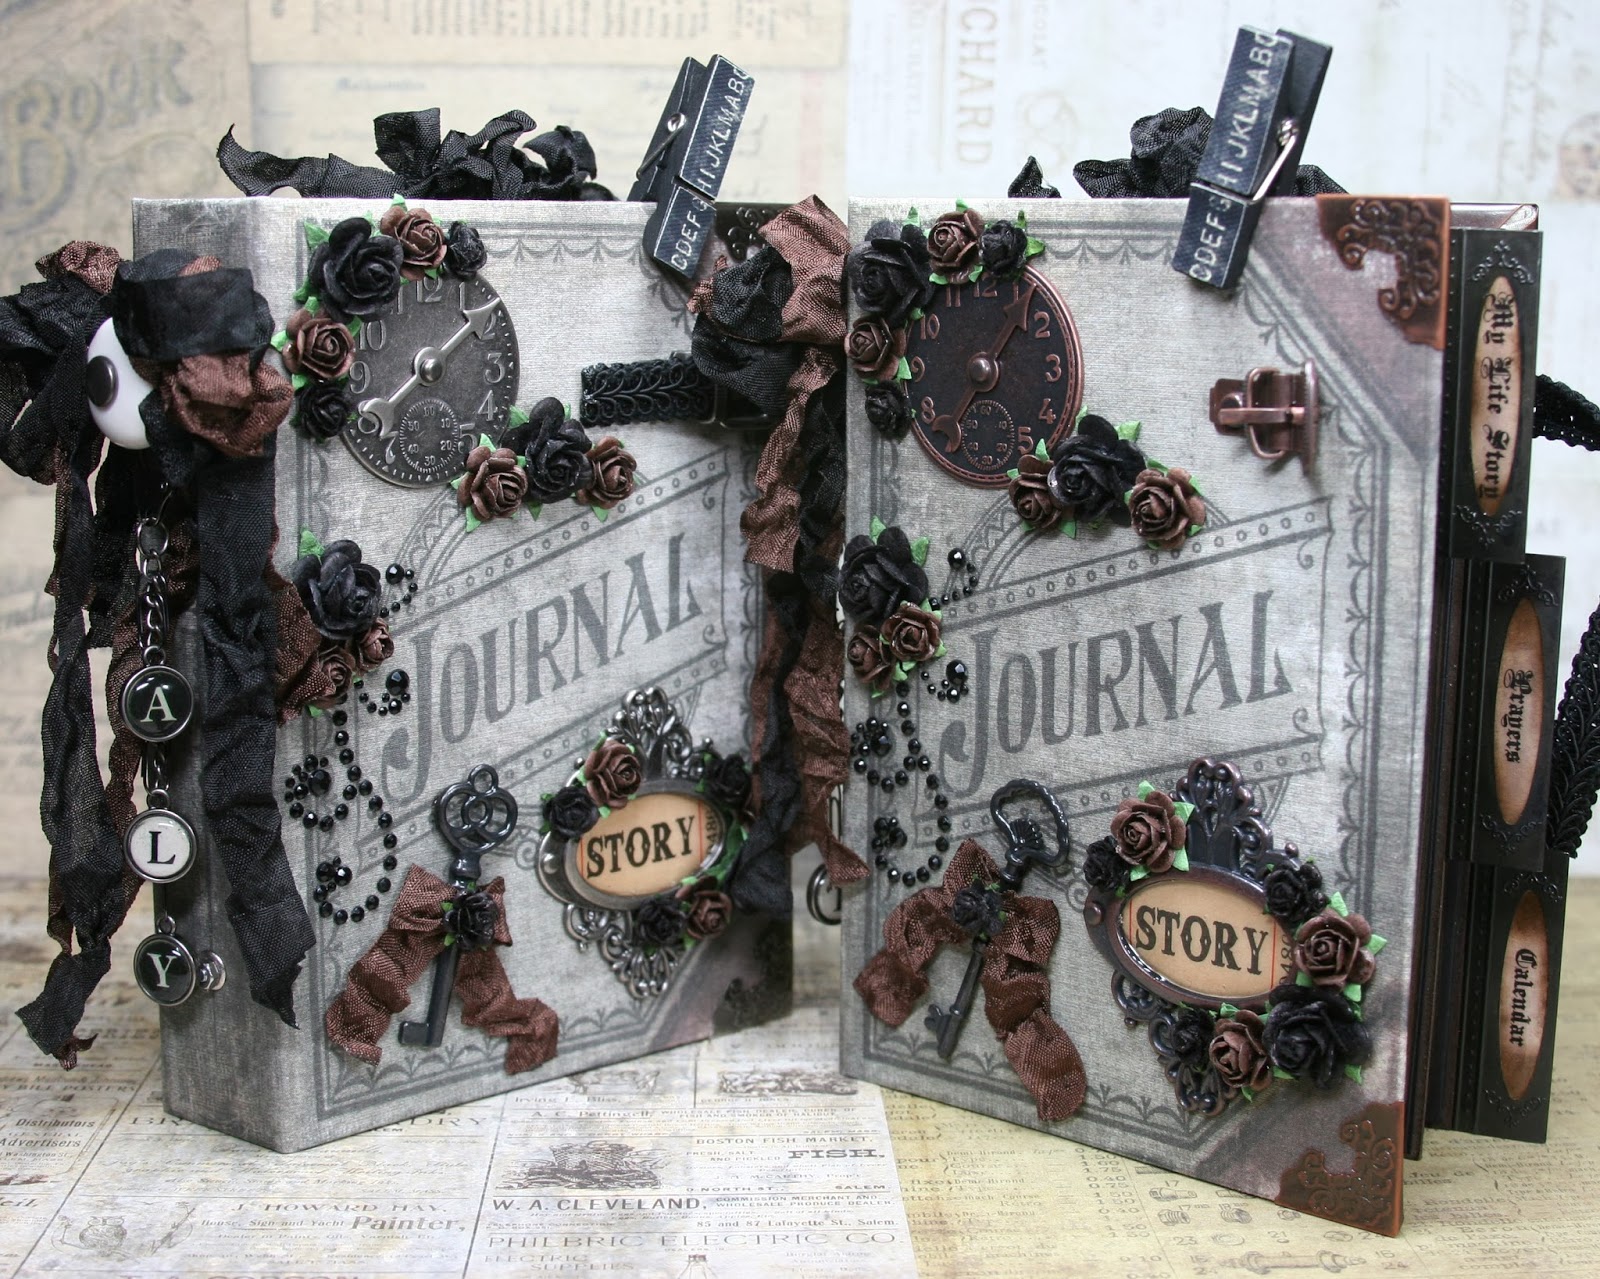
Both journals... with a view of the spine, front & metal tabs
Here's a link for the Wild Orchid Craft Flowers...
I used the "Mixed Brown" Open Roses in 10mm and 15mm.
I also used 20mm "White" Open Roses and colored them with my black Copic Refill

Side view... with Tim Holtz "Curio Knobs" and TH "Type Charms"

Close-up of the Tim Holtz "Type Charms"...
I hung Tim Holtz "Swivel Clasps" from the TH "Curio Knobs".
I made their names with TH "Type Charms"
then used TH "Mini Paper Clips" as jump rings to hang the charms.

Side view... I used Tim Holtz "Buckles" and a piece of ribbon for a closure.
Prima Romance Novel Black "Wood Clip"

Side view... lots of inked pages for journaling!! :)

Close-up of the "Large Black Metal Tabs".
These are available in our store.
Other colors are available and you can always change the color to match your project.
I created the labels in photoshop

Alyssa's (Aly) journal... using Tim Holtz silver embellishments...
"Timepiece"
"Buckle"
"Corners"
"Buckle"
"Corners"
"Game Spinner" for clock hand. FAIL... I should have used 2 spinners!!
"Ornate Plate" with a TH Adage "Story" Ticket and filled in with glossy accents.

Katie's (KT) journal... using Tim Holtz bronze embellishments
"Timepiece"
"Buckle"
"Corners"
"Buckle"
"Corners"
"Game Spinner" for clock hand. FAIL AGAIN... I should have used 2 spinners!!
"Ornate Plate" with a TH Adage "Story" Ticket and filled in with glossy accents.

Inside front cover has a Pocket & Envelope... and...
Divider Page #1 has a Metal Tab with a label titled "My Life Story" and a pocket with tag.
The Butterfly paper represents "I am a new creation in Christ"
The Journal paper represents "Journaling their Life Story"
Printed paper... Tim Holtz "Crowed Attic" 12x12 paper pad
Prima Stamps... "Faith", "Butterfly" & "Love is Patient"

Close-up of the tag
The Journaling Paper is one of the 6x6 prints taken from the Tim Holtz 12x12 "Crowded Attic" paper stack.

The back of Divider Page #1 also has a pocket with Tag... and... Journaling Pages
Paper... "Artist Sketch Diary" from Walmart
Corner Punch... Fiskars "Romantique"
Ink... Tim Holtz "Walnut Stain" Distress Ink
Stamps... Prima "Butterfly" and "Butterfly Label" to write the date

Close-up of the Tag
The Butterfly Paper is one of the 6x6 prints taken from the Tim Holtz 12x12 "Crowded Attic" paper stack.

The back of the Journaling Pages... and... Divider Page #2 has a Metal Tab with a label titled "Prayers" and a pocket with tag
The world map paper represents "Praying for the persecuted church around the world"
The typeset printer block paper represents "All of the devoted Christians around the world who have patiently translated the Bible into other languages... many of whom have lost their lives doing so"
Please pray for our brothers & sisters who are being persecuted around the world!
Here's a link to "Voice of the Martyrs"

The back of Divider Page #2 has a pocket with tag... and... prayer pages.
The "Lock & Key" represent "Prayer is the Key"
I used a wider Prima stamp at the top, for a title or the date.

The back of the prayer pages... and... Divider Page #3 has a Metal Tab with a label titled "Calendar" and a pocket with tag
I used the Tim Holtz "Weathered Clock" die and "Ruler" paper to represent... "Measuring Time"
After gluing the clock to the pocket... I added Ranger "Glossy Accents"

The back of Divider Page #3 has a pocket with tag... and... A 2013 Calendar.
I downloaded this free printable Vintage Calendar from... "CallMeVictorian.com".
I printed it in black & white... inked it... then matted it on black cardstock.
The calendar measures 3" W x 5.75" H
The black mat measures 3.25" W x 6" H

The back of the 2013 Yearly Calendar... and... November 2013 Calendar
I created the "November" calendar in photoshop.

Back of the monthly calendars... and... Inside back cover pocket & envelope
Pocket instructions...
Cut black mat... 4.25" W x 6.25" H
Cut black pocket... 5.25" W x 3.5" H
Score 1/2" on 3 sides
Snip off corners at an angle to create a mitered corner when folded
Fold in all 3 sides to form a 4.25" W x 3" H pocket
Attach pocket to mat
Cut printed paper... 4" W x 2.75" H
attach to pocket front
Cut printed paper... 4" W x 3.5" H
attach to the mat... about 1/2" will tuck under pocket
(Use these same instructions for the pocket in the front of the book)

Close-up of the front of the tags...

Close-up of the back of the tags

Here's a link for the...
Tim Holtz - idea-ology - Mini Album Worn Cover - "Journaler"

Here's a link for the...

Close-up of the envelopes...
I used a very textured paper... the stamps will show up much clearer on smooth paper
I used the Tim Holtz Alterations "Pocket Envelope" Die to make the envelopes
I put Tim Holtz "Adage Tickets" in one envelope and Tim Holtz "Mini Paper Clips" in the other.

"Faith" Prima Clear Stamp with Jewels

"Love" Prima Clear Stamp with Jewels

Monthly Calendars...
I created these in photoshop
Calendars measure 3" W x 5.75" H... inked with Tim Holtz Distress Walnut Stain
Matted on black paper that measure 3.25" W x 6" H
Creating the pages...
Cut white paper 3.75" W x 6.5" H
Punch the decorative corners and ink with Tim Holtz Distress Walnut Stain
Cut black paper 4" W x 6.75" H
Punch the decorative corners
Adhere the white paper to the black mat aligning the decorative corners
Then adhere the matted calendar to the page
Punch the 2 holes to fit on the binder ring
Finish off with hole reinforcers
Finish off with hole reinforcers

Instructions for the Hole Reinforcers...
Punch 1/2" circles... then punch a 1/4" hole in the center

Instructions for the Divider Pages and Pockets...
I used chipboard that comes on the back of a 12x12 paper pad
Cut the chipboard to 4-1/8" W x 6-7/8" H
Ink the edges with Tim Holtz Distress Walnut Stain
Punch out the 2 holes to fit the Tim Holtz Ring Binder
(I used a TH "Mini Album Page Pocket" as a template for the hole placement to match the Tim Holtz "Ring Binder")
Pocket instructions...
Cut black mat... 4" W x 6.75" H
Cut black pocket... 5" W x 5" H
Score 1/2" on 3 sides
Snip off corners at an angle to create a mitered corner when folded
Fold in all 3 sides to form a 4" W x 4.5" H pocket
Attach pocket to mat
Cut printed paper... 3.75" W x 4.25" H
Ink edges and attach to pocket front
Cut printed paper... 3.75" W x 2.5" H
Ink edges and attach to the mat... about 1/2" will tuck under pocket

Here's a link for the...
(I used one of these as a template for the hole placement on the pages & dividers)

Here's a link for the...

Instructions for the Tags...
Cut the white or printed paper 3" W x 6" H
Cut the black mat 3.25" W x 6.25" H
Snip angles at the top of the black mat
Snip angles 1/4" smaller on the white or printed paper
Ink the white or printed paper with TH Distress Ink Walnut Stain
Adhere white or printed paper to the black mat
Punch a hole at the top
Apply a handmade page reinforcer (1/2" circle with a 1/4 hole)
Add black seam binding
Paper used...
White paper... "Artist Sketch Diary" from Walmart
6x6 prints from the Tim Holtz "Crowded Attic" 12x12 paper stack.

Instructions for the Journaling Pages
Cut 4" x 6" pages out of white paper
Punch holes...
(I used one of the Tim Holtz "Mini Album Page Pockets" as a template for hole placement to match the Tim Holtz "Ring Binder")
Punch the decorative corners with your favorite corner punch
I used a LOT of ink on the pages... try to get in the holes & corners too!!!
Stamp with your favorite stamps
This is what I used...
Paper... "Artist Sketch Diary" from Walmart
Corner Punch... Fiskars "Romantique"
Ink... Tim Holtz "Walnut Stain" Distress Ink
Stamps... Prima "Butterfly" and "Butterfly Labels" to write the date

Instructions for the Black Metal Tabs with Labels...
Printout the words for the labels
Cut each label approx. 2" W x 3/4" H
I folded the top down and glued a small piece of folded paper to the back so it would fit tighter in the tab.
After centering the labels in the tab, I added glossy accents
Then I adhered the tab to the cardboard using glossy accents
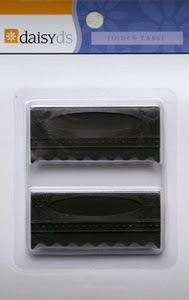
Here's a link for the "Large Black Metal Tabs".

Instructions for Clock...
Create the clock with a Tim Holtz "Weathered Clock" die
Cut to fit the page
Attach a brad to the clock hands
Adhere the clock & hands to your page
Then cover generously with Glossy Accents

Here's a link for Ranger - "Glossy Accents".

Instructions for the Binding...
I attached the TH "Ring Binder" with a TH "Curio Knob" and a small nut & bolt
Instructions for the hanging charms...
I hung Tim Holtz "Swivel Clasps" from the TH "Curio Knobs".
I made their names with TH "Type Charms"
then used TH "Mini Paper Clips" as jump rings to hang the charms.
I also made a black & brown seam binding bow and attached above the knob

Here's a link for the...

Here's a link for the...

Here's the link for the...
Wild Orchid Craft Flowers... I used the "Mixed Brown" Open Roses in 10mm and 15mm.
I also used 20mm "White" Open Roses and colored them with my black Copic Refill
Tim Holtz Supply List...
"Adage" Tickets
Alterations "Pocket Envelope" Die
Alterations "Weathered Clock" Die
"Buckles"
"Corners"
"Crowded Attic" 12x12 Paper Pad
"Curio Knobs"
"Game Spinner"
"Glossy Accents"
Mini Album "Worn Cover - Journaler"
Mini Album Page Pockets "Assorted"
Mini Album Page Pockets "Tags"
"Mini Paper Clips"
"Ornate Plate"
"Ring Binder"
"Swivel Clasps"
"Timepiece"
"Type Charms"
"Walnut Stain" Distress Ink
Other Supplies...
Large Black Metal Tabs
Prima Romance Novel "Wood Clip"
Prima Stamps... "Faith", "Love", Butterfly, "Love is Patient",
Date Labels, Clock, Key & Keyhole
Date Labels, Clock, Key & Keyhole
White Paper... "Artist Sketch Diary" from Walmart
Corner Punch... Fiskars "Romantique"
Vintage Seam Binding... "Black" & "Mimi Brown"
Wild Orchid Craft Flowers... "Mixed Brown" in 10mm & 15mm
"White" Open Roses in 20mm... colored black
Recollections black Key & bling flourish
Black Ribbon for the closure
Small Nut & Bolt to attach the ring binder
I hope this has inspired you to create your own "Time with God" journal!!
Please pray for our brothers & sisters in Christ who are being persecuted around the world!!
Here's a link to "Voice of the Martyrs"
Thank you so much for your visit!! :)
Love through Christ...
Tracy
Do not be led astray by the things of this world.
But, rather be encouraged to Stay True To God.


