Showing posts with label Layouts. Show all posts

Wednesday, January 7, 2015

"Teach Me Your Ways O Lord" 12x12 Wall Hanging using STTG Chipboard & "House of Roses" by LemonCraft!! :)

Hello my sweet friends!!

Here's a 12x12 Wall Hanging I made using lots of NEW "STTG Chipboard"
and the gorgeous "House of Roses" papers from LemonCraft!!

This is one of my favorite Bible verses!! :)

To purchase the "House of Roses" Collection... please click *HERE*

To purchase STTG chipboard... please click *HERE*
(the verse & large corners will be available soon)

 I did a lot of hand stitching with "Ecru" embroidery floss.
All of the chipboard has been inked then coated with Crackle Accents.
The white lace has also been inked & will be available in the store soon.

 STTG Chipboard Corners #1 Large

 The butterflies are from the Labels 1 & Labels 2 Sheets.
I coated them in Glossy Accents and then lifted up their wings.

 The round rose image is from the Labels 1 Sheet.
I used a 1" circle punch and adhered it to the Cabachon & Setting with Glossy Accents.
(The cabachon & Setting will be available in the store soon)
The bow is "Light Beige" Vintage Seam Binding.

LOTS of Wild Orchid Craft Flowers...
Trellis Roses, Cottage RosesOpen RosesHip Rosebuds & Leaves


I'm going to enter this project in LemonCraft's Fan Friday random drawing.

Click the photo below to check it out... 

Click the photo below to check out the LemonCraft Store...


To shop for scrapbook supplies... please visit...


Thank you so much for your visit!!

I hope you all have an awesome creative day!! :)

Love in Christ...


Do not be led astray by the things of this world. 
But, rather be encouraged to Stay True To God.

Tuesday, September 3, 2013

STTG Chipboard & Graphic 45 Secret Garden... Premade Layout

 
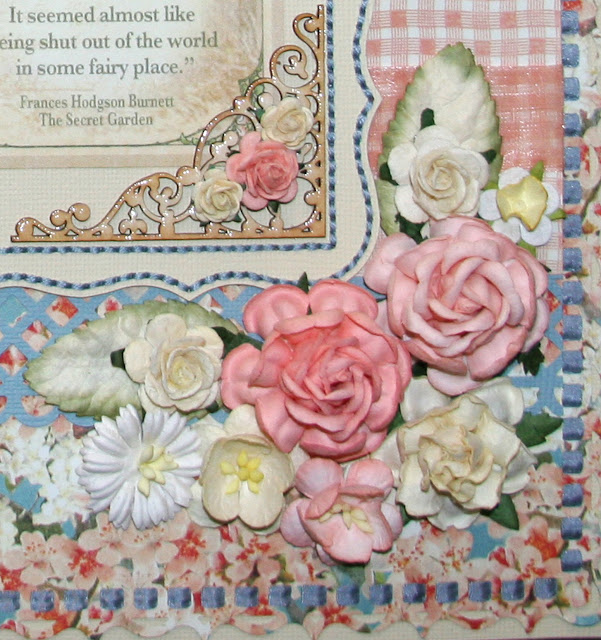
Here's a premade layout using LOTS of STTG Chipboard and Graphic 45's Secret Garden Collection.
I did some hand-stitching around the photo mat and laced blue silk ribbon around the edge.
The Secret Garden Poem can be replaced with a photo.
I used 8 pieces of chipboard... 2 large corners, 2 small corners, 3 butterflies & a hanging sign.
 
You can find all of our STTG Chipboard *HERE*
Graphic 45 "Secret Garden" Papers *HERE*
and the Graphic 45 "Keys" *HERE*
 
 
Here's a close-up of "Hanging Sign 07 - White"
I simply inked the edges, then used Ranger's Crackle Accents and finally a clear coat of Ranger's Glossy Accents.
 
You can find the Hanging Sign *HERE*
 
 
Here's a close-up of one of the large corners (which isn't on the web-site yet!) and "Butterfly 06 - White" that you can find *HERE*
The corner is just inked and has a coat of Ranger's Crackle Accents.
The butterfly simply has peach Colorbox ink on it... that's it!!
Super easy & the color shows up beautifully!! :)
 
Here's a close-up of "Corner 01 - White"... which you can find *HERE*
 
I also used a lot of Wild Orchid Craft Flowers that can be found *HERE*
 
Thank you so much for looking!!
 
I hope you all have an amazing day!! :)
 
Have fun... create... INSPIRE!!
 
Love through Christ,
 
Tracy
 
Do not be led astray by the things of this world.
But, rather be encouraged to Stay True To God.

Friday, July 5, 2013

"God is Love" using STTG Designs Laser Cut Chipboard & Pion Design "Vintage Garden" papers

Hi everyone!! :)

For this 12x12 Wall Hanging I used STTG Designs Laser Cut "White Chipboard Corners" & the beautiful "Vintage Garden" papers from Pion Design...


I did a lot of machine stitching, hand stitching, die-cutting, inking & layering.


For the Laser Cut Chipboard Corners...

I used a Copic Marker (B52) on white chipboard that my husband cut for me...
YAY... Hubby bought a laser!!! :)

Thus the name... "STTG Designs"... is born!!

You can find the corners in our store *HERE*!! :)


For the Birdcage...

I cut blue Pion paper with Tim Holtz "Caged Bird" die and embellished it with...
more blue paper cut with a Martha Stewart Punch
Tiny "border" strips of Pion paper
Tiny white pearls
Metal bird from Michael's
Crystals are hanging by jump rings on the bottom
Birdcage is "hanging" by a string of pearls


For the Postcards...

I matted them on blue Pion paper
Used Tim Holtz inks... Tea Dye & Antique Linen
Tim Holts "Hardware Findings" die for the hinge
Brads
Butterflies were fussy cut from Pion paper
Hot Fix Rhinestones


Side view...

I put paint brushes under the cards while I was gluing them down so they would stay raised.


For the Title...

"Floral Ovals" die by Spellbinders (blue)
Oval was cut from the 6x6 "Flax" paper & hand stitched
Letters were cut with the "Typeset" die by Tim Holtz Alterations
Prima Crystals


For the background...

I used 2 sheets of the "Flax" paper to see more flowers & birds.
I also fussy cut a tiny bird from the 6x6 sheet and put him by the bigger bird at the top.
(see first photo)

I used the following items which are available in the store.
Just click on the photos for more info...

 STTG Chipboard - Corners 01 (4 pcs)

Pion Design - Vintage Garden "Flax"

Pion Design - Vintage Garden "Garden"

Pion Design - Vintage Garden "Borders"

Pion Design - Vintage Garden "Cut-Outs"

Pion Design - Vintage Garden "Tags"

Pion Design - Vintage Garden "Flax" 6x6

STTG Vintage Seam Binding - Lt. Beige

Wild Orchid Crafts "Mixed Blue Tone Hip Rosebuds"

Wild Orchid Crafts "Mixed Blue Tone Cottage Roses"

Wild Orchid Crafts "Mixed Blue Tone Trellis Roses"

Wild Orchid Crafts "Mixed Blue Open Roses 10mm & 15mm"

Thank you so much for looking!!

Have an awesome weekend...

Love through Christ,

Tracy

Do not be led astray by the things of this world.
But, rather be encouraged to Stay True To God!!

Wednesday, February 22, 2012

"SSF... Sweet Sisters Forever"!! Dusty Attic December 2011 Sketch Challenge


I started this layout a couple of months ago for Dusty Attic's December 2011 Sketch Challenge. But, I've been so busy I didn't work on it much and just now finished it!!


There was some "crazy science" happenin' with the Dusty Attic pieces!! I used LuminArte and Ranger's Rock Candy. The color totally changed and the crackle was so deep and crumbly that I had to add glossy accents just to keep it from falling apart!!


In this pic you can see what it looked like when I started... and what the Rock Candy did to the LuminArte!! I left the finished pieces for a long time just trying to figure out if I wanted to use them or not. I tend to be a picky scrapper... and this is totally leaning toward grunge. But, my girls liked them... so I went ahead and used them!! :)


"SSF"
"Sweet Sisters Forever"

I've called my girls sweet sisters for as long as I can remember!! So, for the title I simply used the abbreviation.

I gathered the black ribbon and attached it with glossy accents. But quickly realized this was way to messy. So, after gathering the teal ribbon, I used an awl and poked holes right through the black ribbon and paper then stitched it on. Then I added a strip of rhinestones with glossy accents. I'll be adding the rhinestones to the store when I get a chance. 


You can see how much the pieces changed!!
They are twice as big, the color changed and they are really crackled!!!


The flowers are handmade using Donna Salazar's "Rose Creations" Spellbinder Dies. The tiny butterflies were made with Martha Stewart punches. I just cut two, layered them and added hot fix rhinestones. I'll be adding hot fix rhinestones to the store too!! I add those little gems to EVERYTHING!!


This is an image that my girls colored with copic markers. It was hanging up right behind them when I took their pictures. So, I took a picture of this too!! It totally reminds me of the two of them!! :)


This is the sketch I was following and here's the link to the Dusty Attic Ning Site... http://dustyattic.ning.com/photo

Items used...


LuminArte "Sweet Thistle"

Ranger's Rock Candy & Glossy Accents

Martha Stewart Punches... "Around the Page" & Butterfly

Hot Fix Rhinestones & Applicator

Rhinestone Trim

Well, that's it for now! Thanks so much for looking... I appreciate your visit!!! :)

God bless & big hugs...


Thursday, December 29, 2011

"Ni-Night Titus" - The Color Room Challenge TCR #90


Hey there Blogger Beauties!! :)

I had already started this layout of my daughter, Katie, and our Cockatoo "Titus Too". Then I saw the colors for Challenge #90 over at "The Color Room"... same exact colors... how awesome is that!!! It couldn't have been any easier.  I used a lot of Dusty Attic Chipboard and did a lot of sewing on this one! All of the chipboard is coated in Ranger's Black Enamel Accents and adhered with Glossy Accents.

Here's the Dusty Attic Chipboard I used...

DA0575 - Fancy Trim #5
DA0084 - Bird Cage #3
DA0020 - Mini Sparrow
DA0392 - Vintage Keys
DA0491 - Fancy Labels

I sell Dusty Attic on our website... www.StayTrueToGod.com. I'm expecting a really huge shipment of Dusty Attic anyday now. All of the "Pre-orders" and "Backorders" will be filled first... then the rest will be listed in the store. I've been shipping everything that is in stock immediately... then the "Pre-orders" and "Backorders" ship for no additional fee when my orders arrive.


For the birdcage, I added a strip of crystal rhinestones at the top like a chain and a DA Sparrow that I painted white. The soft downy feather is from my cockatoo!! :)


For the Title, I used one of the Dusty Attic Fancy Labels. I created the title in photoshop, printed it out and cut it to fit the label. Then really drenched it in Glossy Accents so it would look like a huge epoxy embellishment!! :)


Here's a close-up of the DA Vintage Keys...


So... the story behind the photos...

Titus Too is like a forever "Two" year old!!! He needs his naps, has a temper if he doesn't get his way and requires a LOT of attention!! Katie, my sweet 12 year old, is absolutely awesome with him!! She gives him little showers in the sink and wraps him in a towel like a baby. In these photos she is literally rocking the bird to sleep!! If you'll notice... she is holding him soooooo tight that his little wings are laying across her chest!! Oh... and this spoiled cockatoo is named... "Titus Too" after my absolute favorite bible verse... Titus 2.

Thank you so much for stopping by!! I love your visits!! :)

Have an awesome day!! :)

Love through Christ...

Tracy

Do not be led astray by the things of this world.
But, rather be encouraged to Stay True To God.

Thursday, December 23, 2010

"Adore" - My baby girls when they were only 2 & 4!! And a GIVEAWAY!! :)


My girls were looking at old photos... you remember... those expensive films that had to be developed and you always hoped they'd actually turn out!! Well, Katie was sweet enough to scan a bunch of them onto our PC and I just LOVE these pics of "My Baby Girls" at only 2 & 4!! They've always been super, super close "Sweet Sisters"!! I love how they're cuddling together and Lyssa is holding Katie's little hand!!! Gosh... my babies are now 11 & almost 14!! :)


I used Jolaine's technique for making a "Paper Lace Border". I just doubled it for this layout. You can find her tutorial here... http://jolainefrias.blogspot.com/2010/10/couple-of-los-and-tutorial.html


All of the flowers are handmade using the "Water Distressed Flower Technique". I "double dunk" though! I get them wet, crinkle them... open them up... then wet & crinkle them again. I crinkle them up really, really tight while squeezing the water out... just be careful not to rip 'em. When dry, they are somewhat of a pain to open, but I like the "ruffled" look. My Hubby says they look like "spit wads"!! LOL!!!

I used "6-petal" flower punches in 4 sizes. The largest flower has... 1 x-large, 1 large, 1 medium and 2 small punches. For the medium flower, just omit the x-large punch. For the tiny flowers, omit both the x-large and large punches. Try making these with different flower punches! Then have fun inking, chalking, spritzing, drawing, glittering, using copic markers, h2o's and whatever else you can think of on them!! It's so easy to match your projects with your own handmade flowers!!

You can find some great flower tutorials here...

Be sure and check the top right side of Gabi's blog for more tutorials!

This also includes water distressed leaves!
Check out Lisa's older blog posts for more tutorials!

Be sure and check the top right side of Vicky's blog for more flower tutorials!

I have "Lily" and "Cherry Blossom" Punches 25% off in the store through December 31st.


To make the glittery butterflies... I used a Martha Stewart punch, inked the edges and stuck them to double-sided "sticky Paper". Then cut the paper close to the edge of the butterflies and sprinkled them with pink "Art Glitter".  I used a "Hot Fix Applicator" to attach the "Hot Fix Rhinestones". If you want your butterfly's wings to "flutter" DON'T take the back of the sticky paper off. However, using double-sided sticky paper is a great way for you to make 3D sticker embellishments!


I love the glittery birdcage from the "Adore" Fly Away Glittered paper!! So, I cut it out and used it here!! I used the large flower to cover up a cut in the stand and the missing foot on the base.

Do you like the glittery "Lost & Found" Collection too? You could win a set of your choice in our monthly GIVEAWAY... next one is on December 31st! Are you on our mailing list?? Check out http://www.staytruetogod.com/ and click on the "Visit My Store" link and enter your email address in the "Join our mailing list" box. I post the winners here and on the website.

All 100 items from the "Lost & Found" Collection are available in the store.

Well, I hope you all have an amazing "Christ" filled Christmas!! :)

God bless & big hugs...

Do not be led astray by the things of this world.
But, rather be encouraged to Stay True To God.